Once you have SharedInbox setup and ready to go in your Slack workspace, you can start managing your email directly from Slack. This guide provides steps on how you can compose and send a new email.
Emails are sent from the same email address you set up in the Slack channel, and will go through your email provider (Gmail, Outlook, etc…). For example, if you configured a Google Workspace email called [email protected], people will see emails they receive from you as [email protected] as usual.
Composing an Email #
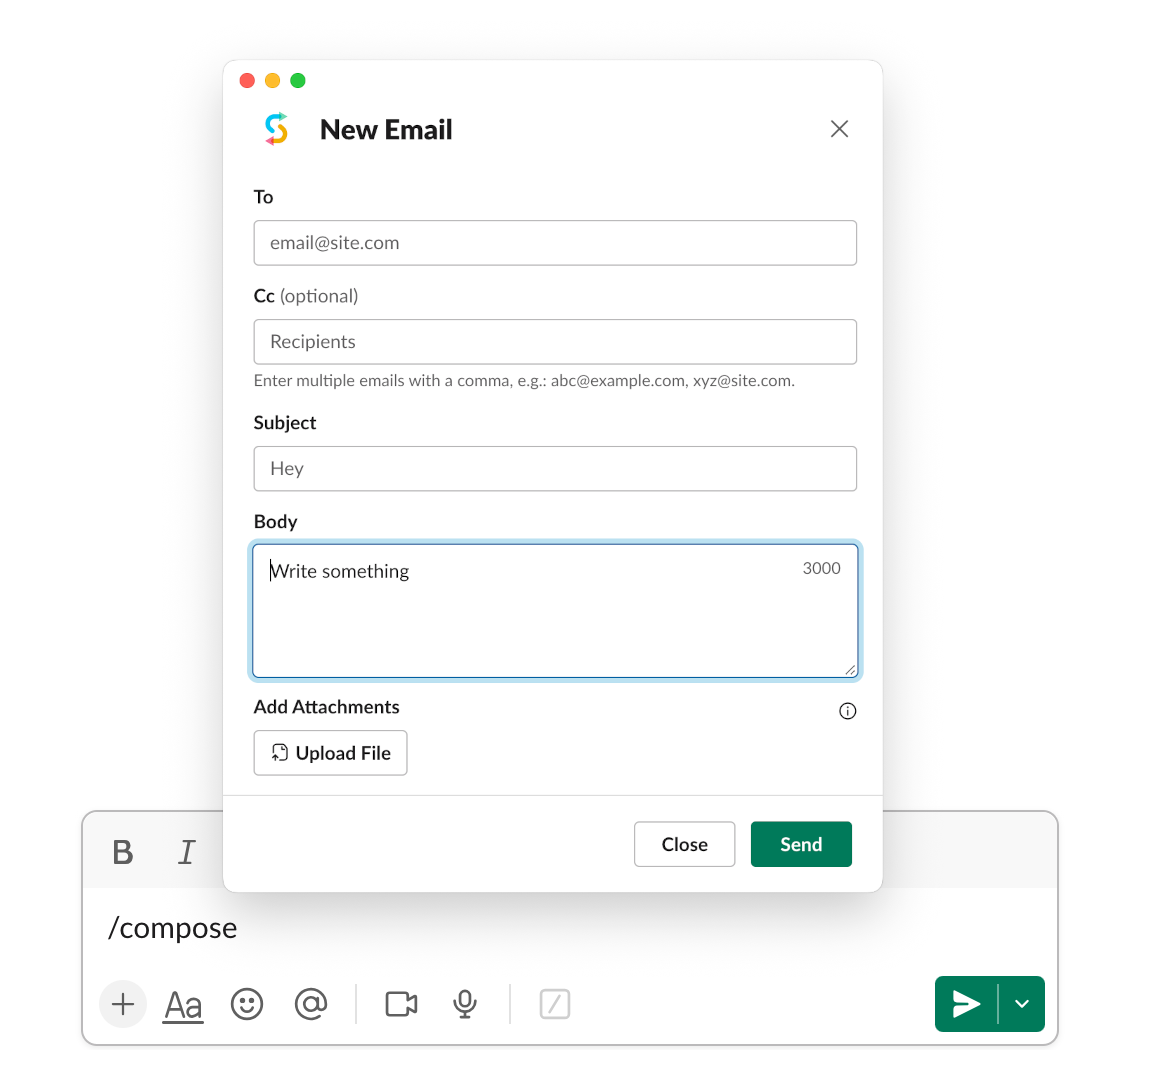
Type /compose from the message box in the Slack channel where your email is connected, then hit Enter/Return to pop up a New Email window:

Fill out the usual email fields:
| To | Email address you’re sending to |
| Cc (optional) | A list of email addresses to CC. You can enter more than one email to CC, by separating them with a comma. |
| Subject | Email subject line |
| Body | Email message body (max of 3000 characters) |
| Add Attachments (optional) | If you have files to send, you can upload and attach them here. There is a max of 10 files, and each file can only be 10MB in size max. A list of file types supported by Slack can be found here. |
After you’ve composed your email, click the Send button to send it.
The email you send will also show as a threaded post in your Slack channel. Any replies will be posted as a message in this thread.
Troubleshooting #
Add Attachments not showing #
If you don’t see the Add Attachments option in the New Email window, you will need to reinstall the @SharedInbox app to your Slack workspace. This can be easily done by visiting https://sharedinbox.co/install in your browser, and logging in/re-authorizing the SharedInbox Slack app again.
This should only be an issue for existing SharedInbox users. When we added the attachments feature, we needed to request some additional Slack permissions in order to read and upload files to workspaces, which requires customers to re-authorize the app.


